
Introduction
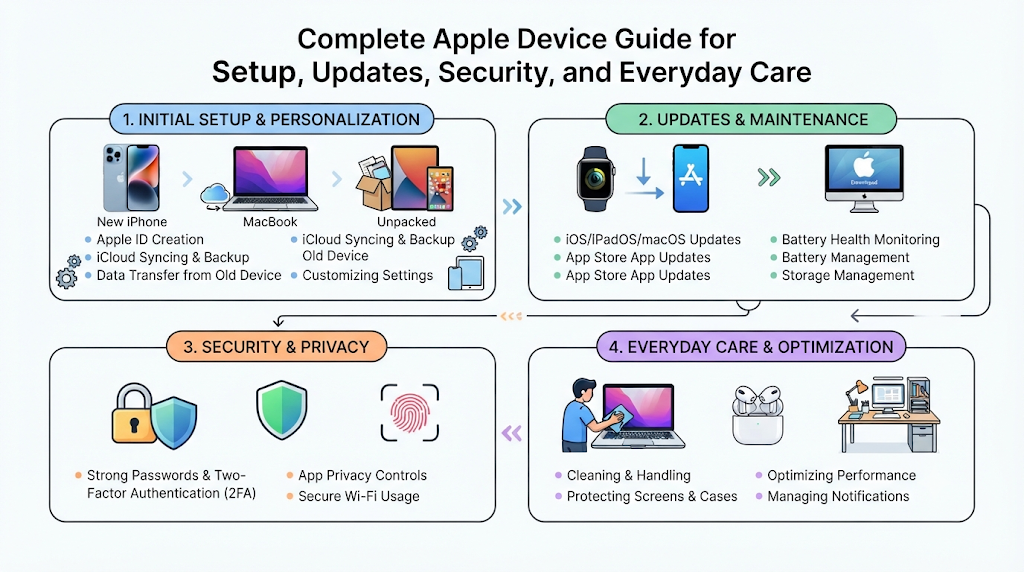
Getting a new Apple device or installing a big software update feels exciting. Yet small snags like Wi-Fi drops, missing photos, or confusing menus can slow down your day. You do not need to be a tech expert to manage your iPhone or Mac well. This guide walks you through simple steps for setup, updates, backups, and daily fixes. With clear tips and helpful tools from Osnivo, you can keep your Apple gear running smoothly and safely.
Check Device Compatibility Before Updating
Apple releases major software updates every year to add helpful tools and fix security holes. Before you hit the download button, check if your older phone or computer supports the new system.
If you are looking for iOS 27 compatible iPhones, remember that Apple drops support for older chips over time. Always verify the official supported model list on Apple’s website or through the Osnivo Compatibility Checker before starting an update. Newer models get all the latest smart features, while older supported phones may only receive basic security patches.
The same rule applies to laptops and desktops when checking for macOS 27 compatible Macs. Macs with Apple silicon chips, like the M1, M2, M3, or M4 series, handle modern updates much better than older Intel Macs. Checking compatibility first saves you from failed downloads and wasted time.
Decide If You Should Update Right Away
Many people ask, should I update to iOS 27 on the very first day it comes out? Waiting a few days or a week is often a smart move for everyday users.
Early software releases sometimes contain minor bugs that drain your battery or cause apps to crash. Giving Apple a week or two lets them release quick bug fixes. You can check the Osnivo Should I Update Tool to read clear release notes and safety details before you install anything.
When you are ready to update, follow these simple steps to prepare:
- Plug your device into a wall charger so the battery stays above fifty percent.
- Connect to a fast and steady home Wi-Fi network.
- Free up at least ten gigabytes of storage space by deleting old videos or unused apps.
- Run a fresh backup so your personal files stay safe.
How to Set Up a New iPhone Easily
Opening a fresh box is fun, and learning how to set up a new iPhone takes only a few minutes. Turn on the phone by pressing and holding the side button until the Apple logo appears.
Follow the welcome screens to pick your language and region. Next, connect to your home Wi-Fi network and set up Face ID or Touch ID to lock your screen. You will also create a six-digit passcode that keeps your private data safe from strangers.
Sign in with your Apple Account email and password to sync your messages, contacts, and app purchases. If you get stuck during the welcome screens, the Osnivo Setup Companion offers clear, step-by-step help for every supported model.
Transfer Data From Android to iPhone
Switching from another phone brand does not mean losing your favorite photos or contacts. The easiest way to transfer data from Android to iPhone is by using Apple’s free Move to iOS app.
Download the Move to iOS app from the Google Play Store onto your old Android phone first. Keep both phones plugged into power and connected to the same Wi-Fi network. During your new iPhone setup, tap the option to move data from Android on the Apps & Data screen.
A six-digit or ten-digit code will appear on your iPhone screen. Enter that code into your Android phone, pick the items you want to move, and wait for the loading bar to finish.
| Data Type | Moves via Move to iOS App | Needs Manual Transfer or Cloud App |
|---|---|---|
| Contacts and Messages | Yes, moves directly to Phone and Messages | Not needed |
| Photos and Videos | Yes, moves to the Apple Photos app | Optional via Google Photos |
| WhatsApp Chats | Yes, if selected during setup | Not needed |
| Paid Apps | No, must re-download free versions | Yes, buy paid apps again on App Store |
| Music Files | No, streaming apps sync via login | Yes, move local MP3 files via computer |
Do not touch either phone while the transfer runs, as switching apps on Android can pause the process. If you need extra help planning a big move, the Osnivo Migration Planner guides you through moving files across different platforms.
Essential iPhone Settings Guide for Daily Use
Once your phone reaches the home screen, taking five minutes to adjust a few switches improves your daily experience. Use this simple iPhone settings guide to customize your phone right away.
Open the gray Settings app and tap Display & Brightness. Turn on True Tone so the screen matches the lighting in your room, which helps reduce eye strain. You can also turn on Dark Mode at night to save battery on OLED screens.
Next, go to Notifications in the Settings app to stop noisy alerts from distracting you. Turn off alerts for shopping apps and games, and keep them on only for calls, texts, and calendar reminders. If you ever struggle to find a hidden menu, the Osnivo Settings Pathfinder points you directly to the right toggle.
Fix Common Network Issues When Your iPhone Won’t Connect to Wi-Fi
A weak internet connection stops you from browsing, streaming, or downloading updates. If your iPhone won’t connect to Wi-Fi, start with the simplest fixes before changing deep network settings.
First, swipe down from the top-right corner of your screen to open Control Center. Tap the Airplane Mode icon to turn it on, wait ten seconds, and tap it again to turn it off. This quick reset forces your phone to search for fresh wireless signals.
If that fails, try these proven steps:
- Unplug your home Wi-Fi router from the wall for thirty seconds, then plug it back in.
- Open Settings, tap Wi-Fi, tap the blue info circle next to your network, and tap Forget This Network.
- Reconnect to the Wi-Fi network by typing your password again carefully.
- Go to Settings, tap General, scroll down to Transfer or Reset iPhone, tap Reset, and choose Reset Network Settings.
Resetting network settings clears saved Wi-Fi passwords and Bluetooth pairings, so keep your router password handy. For step-by-step help with stubborn errors, Osnivo Fix organizes simple troubleshooting guides for common Apple problems.
How to Back Up an iPhone Safely
Phones can get lost, dropped in water, or stolen when you least expect it. Knowing how to back up an iPhone ensures you never lose family photos, notes, or important messages.
Apple gives you two main ways to save a copy of your phone. You can use iCloud over Wi-Fi, or you can plug your phone into a Mac or Windows computer using a cable.
| Backup Method | Internet Needed | Storage Limit | Best For |
|---|---|---|---|
| iCloud Backup | Yes, requires Wi-Fi | 5 GB free, paid plans up to 12 TB | Automatic daily backups while sleeping |
| Mac Finder Backup | No, works offline | Limited only by your Mac hard drive | Fast local backups and full device copies |
| Windows Apple Devices App | No, works offline | Limited only by your PC hard drive | Windows users who avoid cloud fees |
To turn on iCloud Backup, open Settings, tap your name at the top, tap iCloud, and tap iCloud Backup. Turn the switch on so your phone backs up automatically every night while locked and charging. If you use a Mac, connect your iPhone with a USB cable, open Finder, click your iPhone in the sidebar, and click Back Up Now.
Follow This iPhone Security Settings Checklist
Keeping your personal life private requires a few smart locks on your Apple Account and device. Work through this iPhone security settings checklist to protect your money, photos, and passwords.
- Turn on Two-Factor Authentication: Open Settings, tap your name, tap Sign-In & Security, and make sure Two-Factor Authentication is on. This sends a six-digit code to your trusted devices whenever someone tries to log into your account.
- Enable Stolen Device Protection: Go to Settings, tap Face ID & Passcode, and turn on Stolen Device Protection. This adds a security delay before anyone can change your Apple Account password away from home.
- Check Find My iPhone: Open Settings, tap your name, tap Find My, and turn on Find My iPhone and Send Last Location. This lets you locate or erase a lost phone from a web browser.
- Limit App Location Access: Go to Settings, tap Privacy & Security, and tap Location Services. Set most apps to While Using the App instead of Always.
- Use Strong Passwords: Open the Apple Passwords app to spot weak or reused logins and replace them with strong, unique ones.
No single setting blocks every online trick, so always stay alert against fake text messages asking for your Apple password. Checking your privacy settings twice a year keeps your digital life safe.
Record Your Screen Using QuickTime Player on Mac
Mac computers include built-in tools that save you from buying extra software for basic tasks. Learning how to use QuickTime Player screen recording Mac features helps you make quick tutorials, save video calls, or show tech support what is happening on your screen.
Open the Applications folder on your Mac and double-click QuickTime Player. Look at the top menu bar, click File, and choose New Screen Recording from the list. A small control bar will appear at the bottom of your screen with clear recording options.
Click Options on that bar if you want to record your voice using the built-in microphone. Choose whether to record the entire screen or drag a box to capture just one window, then click Record. When you finish, click the small Stop button in the top menu bar, and QuickTime will open your video so you can trim or save it.
Manage Your Apple Gear With Simple Habits
Taking care of your Apple devices does not require hours of maintenance every week. Restart your iPhone and Mac once a week to clear temporary memory glitches and keep apps running fast.
Clean your charging ports gently with a wooden toothpick if your cable feels loose. Wipe screens with a soft microfiber cloth instead of harsh window cleaners that strip away protective screen coatings. You can also save your exact device models and software versions inside My Osnivo so you always see tips that match the gear you actually own.
Frequently Asked Questions
How do I find out which iOS version my iPhone is running? Open the gray Settings app on your home screen and tap General. Next, tap About at the very top of the menu. Look at the line labeled iOS Version to see the exact number installed on your phone.
What are the iOS 27 compatible iPhones? Apple publishes an official list of supported iPhones on its website whenever a major iOS release arrives. Generally, Apple supports iPhones released within the past five to six years. You can check your exact model using the Osnivo Compatibility Checker before downloading an update.
Should I update to iOS 27 right away or wait? Waiting about one week after a major software release is a safe habit for most people. Apple often releases small follow-up patches quickly to fix early battery drain or app bugs. Check the Osnivo Should I Update Tool to review release details first.
Why does my iPhone say No Internet Connection on Wi-Fi? This message means your phone connects to your router, but your router cannot reach the wider internet. Unplug your internet modem and Wi-Fi router for thirty seconds, then plug them back in. If the problem stays, contact your internet service provider to check for local outages.
Can I transfer data from Android to iPhone after I already set up my phone? The Move to iOS app only works while your new iPhone is on the initial welcome setup screens. If you already finished setting up your iPhone, you must erase it in Settings under General and Transfer or Reset iPhone to start over. Alternatively, you can download Google Drive on both phones to move contacts, calendars, and photos manually.
How do I check for macOS 27 compatible Macs? Click the Apple menu in the top-left corner of your screen and select About This Mac to see your computer model and chip year. Compare that model name against Apple’s official compatibility list or check it on Osnivo. Newer Macs with Apple silicon chips support the latest macOS features best.
Where can I find a simple iPhone settings guide for beginners? You can explore the main menus inside your iPhone Settings app, starting with Display & Brightness, Notifications, and Battery. Each section uses plain labels that explain what the switches control. You can also use Osnivo Settings Pathfinder to locate specific options quickly.
How often should I follow steps on how to back up an iPhone? Setting up automatic daily backups in iCloud is the easiest way to protect your files without thinking about it. Your iPhone backs up every night while plugged into power, locked, and connected to Wi-Fi. If you prefer computer backups, try to plug your phone into your Mac or PC at least once a month.
What is the most important item on an iPhone security settings checklist? Turning on Two-Factor Authentication for your Apple Account is the strongest step you can take. Even if someone guesses your password, they cannot enter your account without the special code sent to your trusted device. Turning on Find My iPhone and Stolen Device Protection adds strong backup layers.
Does QuickTime Player screen recording Mac capture internal computer audio? By default, QuickTime Player records your screen video and audio from your Mac microphone, not internal system sounds. To record sound playing inside your Mac apps, you need a free audio routing tool or macOS built-in screen capture tools. Always test a five-second clip first to check your sound levels.
Conclusion
Understanding your Apple devices makes everyday life much easier and less stressful. When you check compatibility first, keep regular backups, and lock down your privacy settings, your iPhone and Mac stay fast and reliable for years.
Whenever you run into a tricky error or plan to switch devices, take things one simple step at a time. Visit Osnivo whenever you need clear guides, compatibility checks, or calm troubleshooting advice tailored to your Apple gear.